How to Delete Muliple Records Using Checkbox in Oracle Application
Oracle Application already provides you Standard Delete functionality in Oracle Application Development Framework, from the standard Delete functionality you can easily delete you data / record one by one from the specific table/block.
Here we bring a new delete functionality depending on the users which record they want to delete. so follow the below steps one by one.
Step 1:
Go to the Table View, where you want to add Checkbox
- Select Attributes Tab on the left corner, then click on + (plus sign)
Step 2:
As you click on + sign, you will see the View Attribute Popup
- Name: RollRecDelDetFlag
- Updatable: Always
- OK
Step 3:
After Click OK Button you will see your Transient Attribute has been created.
Step 4:
In Step 4 we shared four images so you can easy to understand, go the your page where you want to add this Transient Field and you need to first refresh the Data Control to visible your Transient Field
- Drag and Drop - RollRecDelDetFlag Attribute in your block
- When you are dropping the Attribute you need to select the Checkbox (Don't select Input Text / Lov / Choice List etc.
- As you click on Checkbox, Popup will be appeared in your screen and you have to write Y for Selected State Value, N for Unselected State Value, then click OK
- Set your field using Property (Center Align / Width / Label etc)
- Checkbox - AutoSubmit should be true (It is mandatory)
- Last point in step 4 is to add custom button from component - Delete
Step 5:
Click on Delete button to Create Method using Bean
How to Create Bean in Oracle ADF
- First click on Delete Button
- Set PartialSubmit should be true (It is Mandatory)
- Edit on ActionListener
- Select Bean (PwcRollsReceiveDelivery)
- Create Method (deleteRollDet) - Click on new button
public void deleteRollDet(ActionEvent actionEvent) {
BindingContext bctx = BindingContext.getCurrent();
BindingContainer bindings = bctx.getCurrentBindingsEntry();
OperationBinding operationBinding = bindings.getOperationBinding("deleterollDetail");
operationBinding.execute();
///// Refresh Table Block /////
AdfFacesContext.getCurrentInstance().addPartialTarget(pwcOmRollRecDelDetTbBind);
///// Refresh Table Block /////
}
AppModuleImpl.Jave Code :
public void deleterollDetail(){
String flag = "N";
ViewObject populatevo = getPwcOmRollRecDelDetVO1();
RowSetIterator it = populatevo.createRowSetIterator("yy");
while (it.hasNext()) {
Row row = it.next();
try {
flag = row.getAttribute("RollRecDelDetFlag").toString();
} catch (Exception e) {
flag = "N"; }
if (flag.equals("Y")) {
row.remove(); }
}
it.closeRowSetIterator();
}
Step 6:
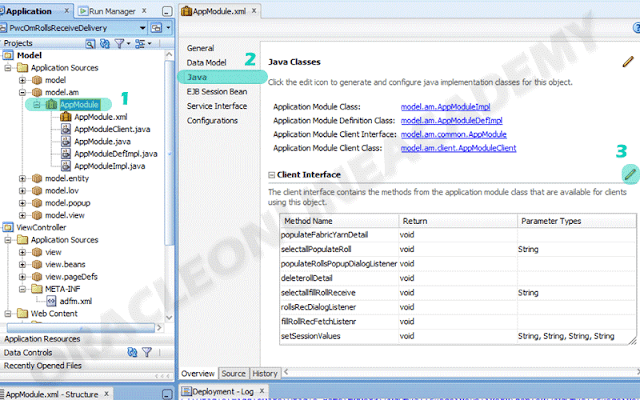
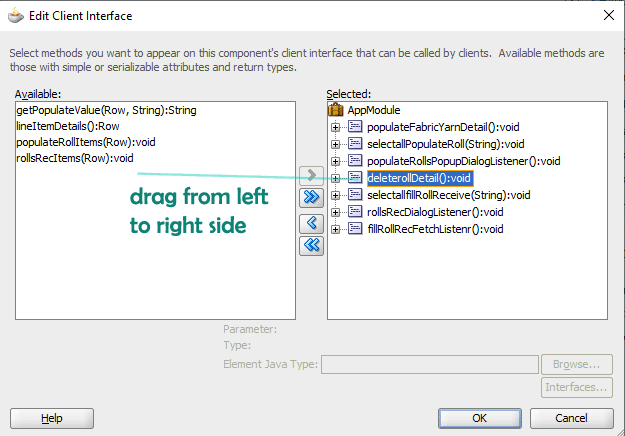
First you add the Method in Application Module:
- Go to the Application Module
- Select Java Tab
- Click on pencil sign
Step 7:
Now add bind into your Page
- Click on Edit Page
- Click on Binding
- Click on + (plus sign)
If you facing any issue / query regarding this article you can comment below. Thanks


No comments:
Thank you for your comment...!